There are myriad ways video is being used:
- Teaching concepts
- Demonstrate procedures
- Introduce simulation scenarios
- Patient education
- Screencast lectures
- Recording online meetings
Producing High Quality Video
The best of the videos being made today are professional, educational, moving, and creative. We are all inspired by TED and Kahn Academy, and strive to produce videos that are dynamic and can hold an audience’s attention while simultaneously educating them. The are storytelling at its best. This level of professionalism, requires a large investment. Not necessarily of money. Professional quality audio and video recording equipment, editing software, graphics, storage, and distribution, have plummeted in price and are widely available.
What educators often find they lack is the expertise need to use these tools to the level they desire. We have been trained as physicians. Some have sought out additional training in education, but audio-video production is its own profession that has its own vocabulary, grammar, and techniques. Things people spend careers learning and perfecting, just as we do as doctors.
As physician educators we may not have the spare time to invest. If this is the case, seeking out expertise for help is perfectly acceptable. But it is still your responsibility to design the education content. To define the educational objectives, design the instruction and teaching method, and create and refine your content. These are done before any recording or editing is started.
Defining Objectives for Your Lesson
The process should with defining the list of educational objectives for the content. This should be 4-5 items. I find it useful to place them in ascending learning level. For example, objective 1 should be achieved by all learners and objective 5 would be met only by the advanced students. The ACGME has encouraged the use of milestones in residency education, which can serve as a framework for our educational project. Well thought out objectives though, can focus the rest of the work.
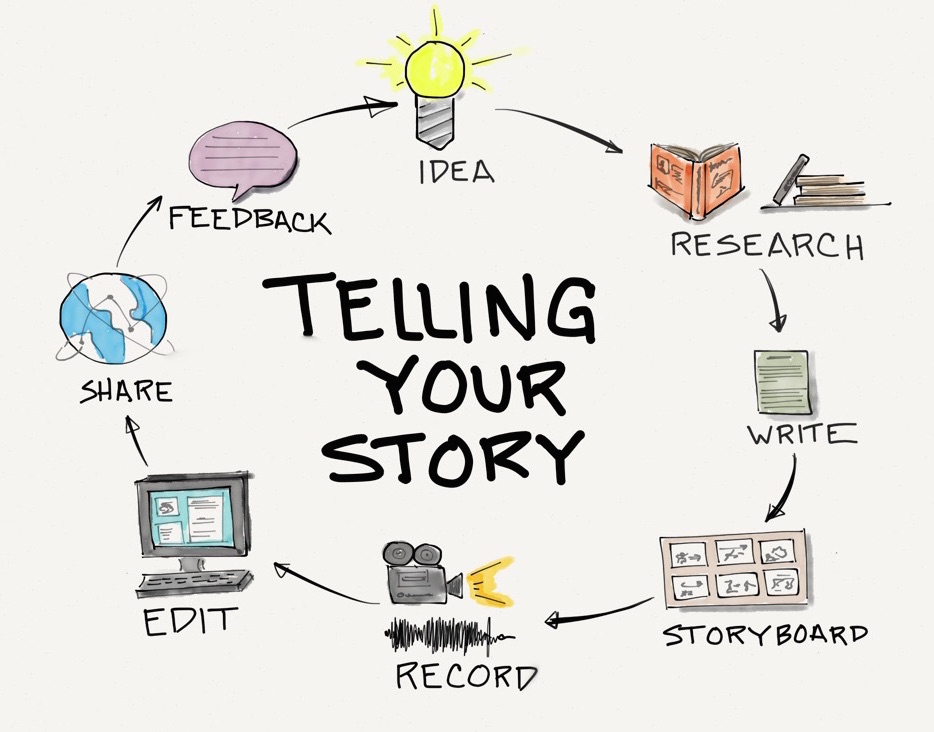
I like to image the content creation cycle. It begins with an idea and the educational objectives you have defined. We usually need to research the topic and review the latest literature. Next we create and outline and write the script. This can then storyboarded, which allows us to record, edit, and share the video.
Content Creation Cycle
There are a large number of forms your teaching session can take. In a previous post we discusseed a number of options for a flipped classroom.
Using Storyboards
If you have decided to incorporate video, it is critical to plan the video. Shooting, editing, recording audio, producing graphics is very time-consuming and expensive, so planning the video helps you define your video. It tells everyone what shots will be required, what graphics are needed.
I have found that the best way to do this is by storyboarding your video, after the objectives have been defined and the content material developed. The idea of storyboarding and techniques were originally created by Walt Disney. A storyboard allows you to plan how you will visually tell your story. This allows the scope the production before picking up the camera.
The important thing about storyboards is that they give you a way to decide how you will split up your script into individual segments, either with or without placeholder images, so that you can then get a clearer overview of your digital story plan. It is the equivalent of creating an outline for paper or blog post.
Creating storyboards may seem like a tedious extra step. However, storyboarding can be a valuable component in the creative process by allowing you to organize images and text in a blueprint fashion. It allows you to visualize how the project will be put together and help illustrate what holes exist since you can see the entire plan laid out in front of you. Storyboarding can also inspire new ideas as well as lets you easily rearrange existing resources before the final development begins and changes would be harder to make.
Storyboards may be created in a variety of ways, both digitally and manually on paper. You can use a computer, iPad, notecards, notebook, or even loose leaf copier paper. I personally favor digital storyboarding, and am a fan of using Paper on iPad. But there is really no restrictions on how you work.
A storyboard is a sequential description of the elements of the story such as images, text, narration, music, transitions, shots. They are arranged in in the chronological order in which they will appear in the story.
Things to include in your storyboard:
- Boxes are read left-to-right.
- In each box draw the basic composition. Art is not the key here. Sick figures are fine.
- Key props should be included.
- Indicate camera changes — pan, zoom in/out, focus rack
- Blocking (position and movement of the actors) should be indicated.
- Changes between shots (eg jump cuts, fades) should be indicated if important to the storytelling
- As the story becomes more developed, I find it useful to add notes for music cues, sound effects, and ambient noise.
Since the storyboard is a visual plan for your film, it useful to become familiar with the basic language used in film.
- Understand the different kinds of shorts. Long shot (also called an establishing shot since it lets audiences see the whole scene), medium shot, close up. There are variations in between, but each shot conveys its own king of emotion and action. It is a general rule that when cutting between shots, that you should not have two of the same type in a row
- For every action shot, you should also film a reaction shot.
- Avoid panning like crazy. In a single shot, you should not pan in more than one direction as it can be quite disconcerting to the audience. This is the reason I think Prezi did not catch on. While the idea was interesting, the zoom in/out and all around caused too much distraction.
- Shoot to edit. Fast paced news recording generally shoot shots in sequence. Boy walks up to balloon stand, close of boy’s face looking at the balloons, medium shot of boy paying, close up of money exchanging hands, medium shot of seller handing the balloon to the boy, etc. Unfortunately, this is not always the most efficient way of getting all the shots and duplicates setups. If your have thought through your storyboard, you can plan the shots out of order and edit them together afterwards.
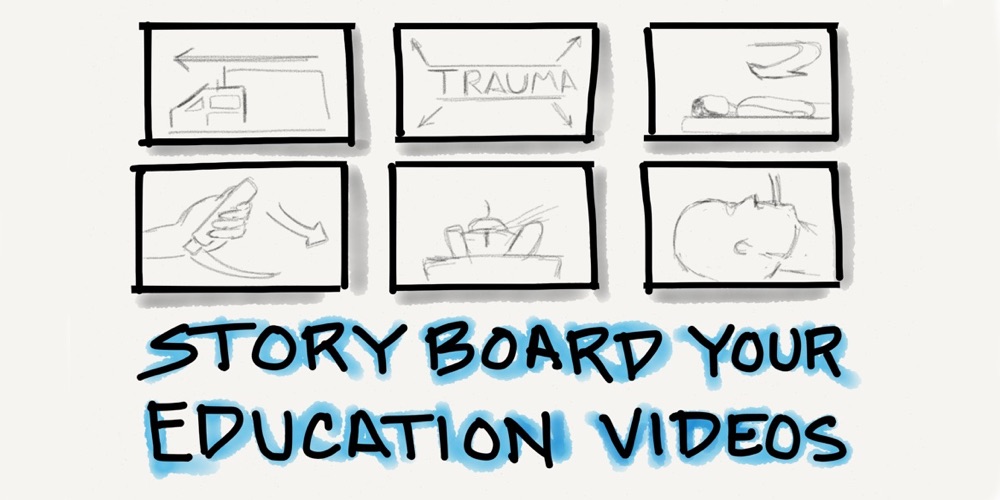
Example Storyboard
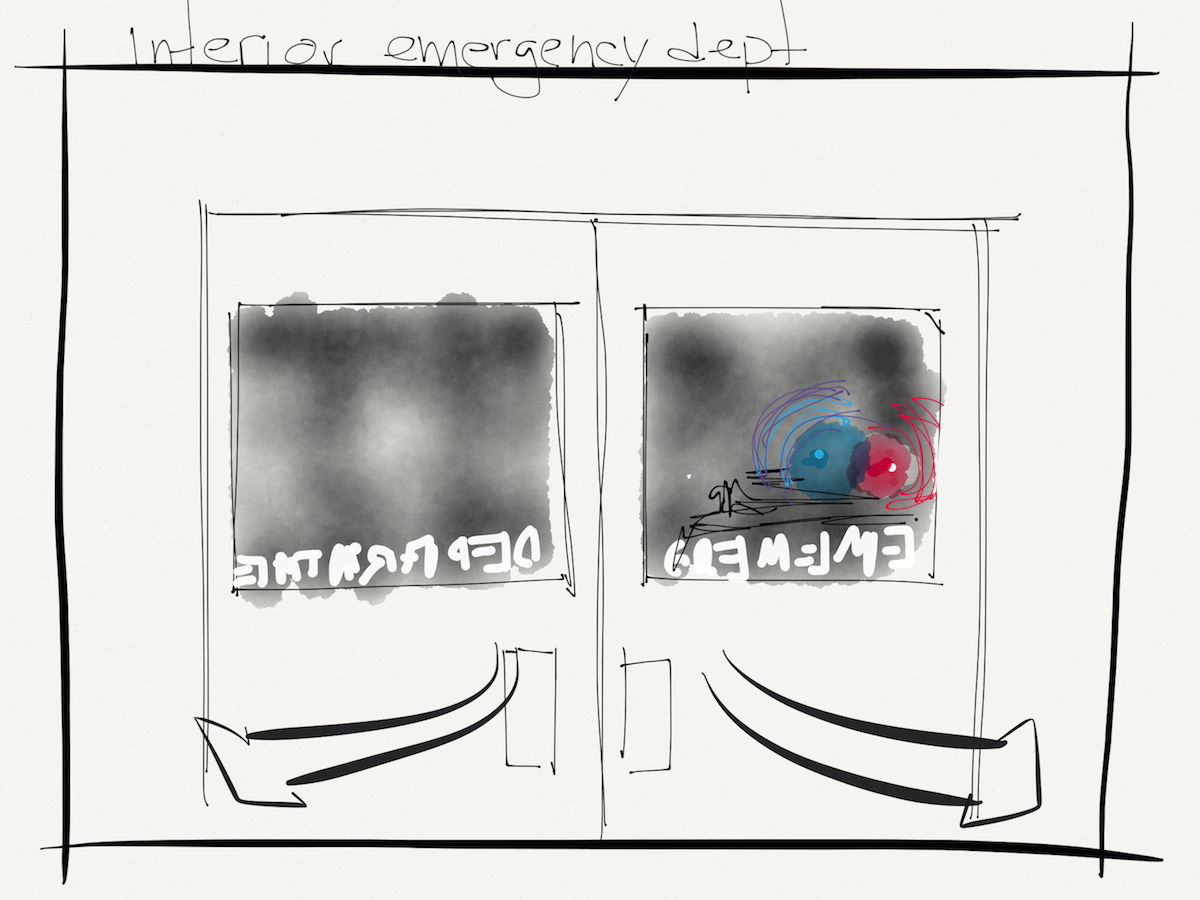
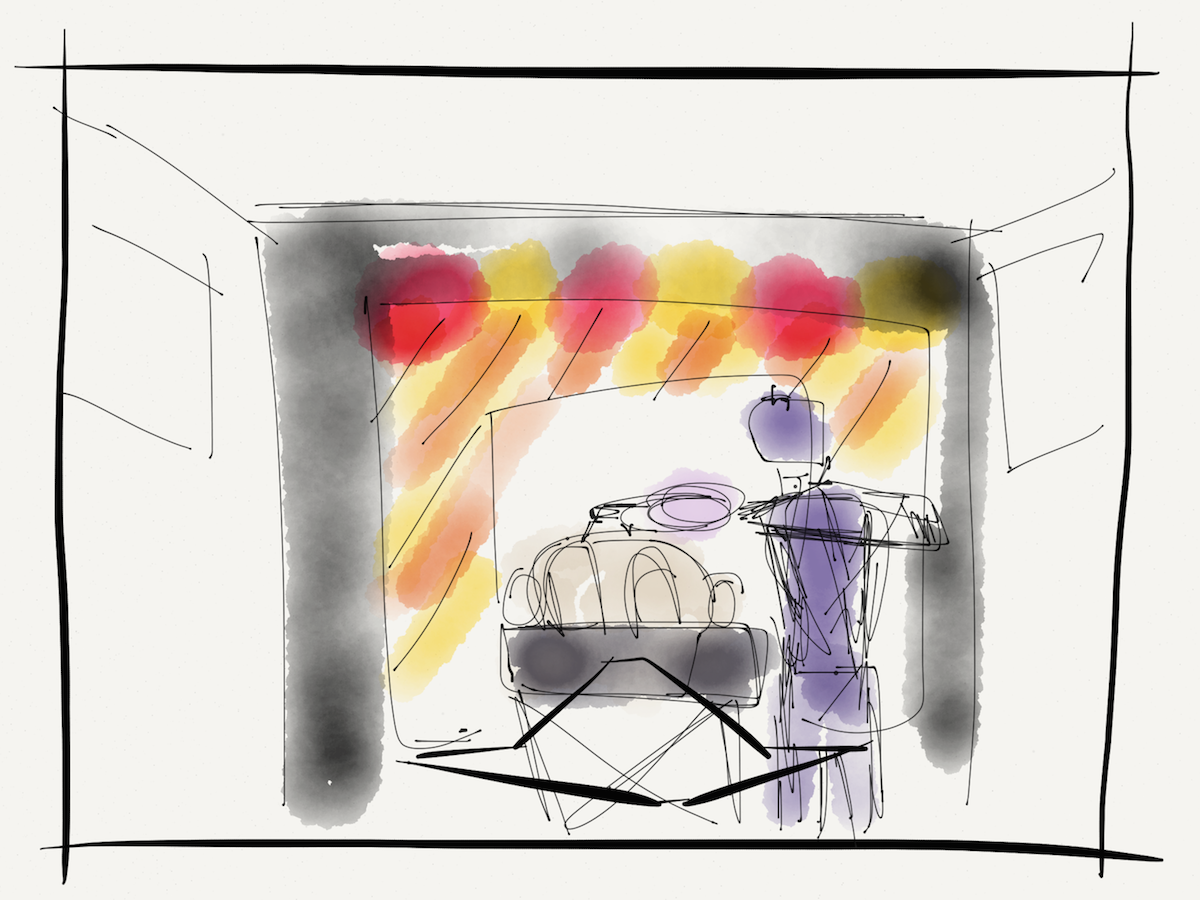
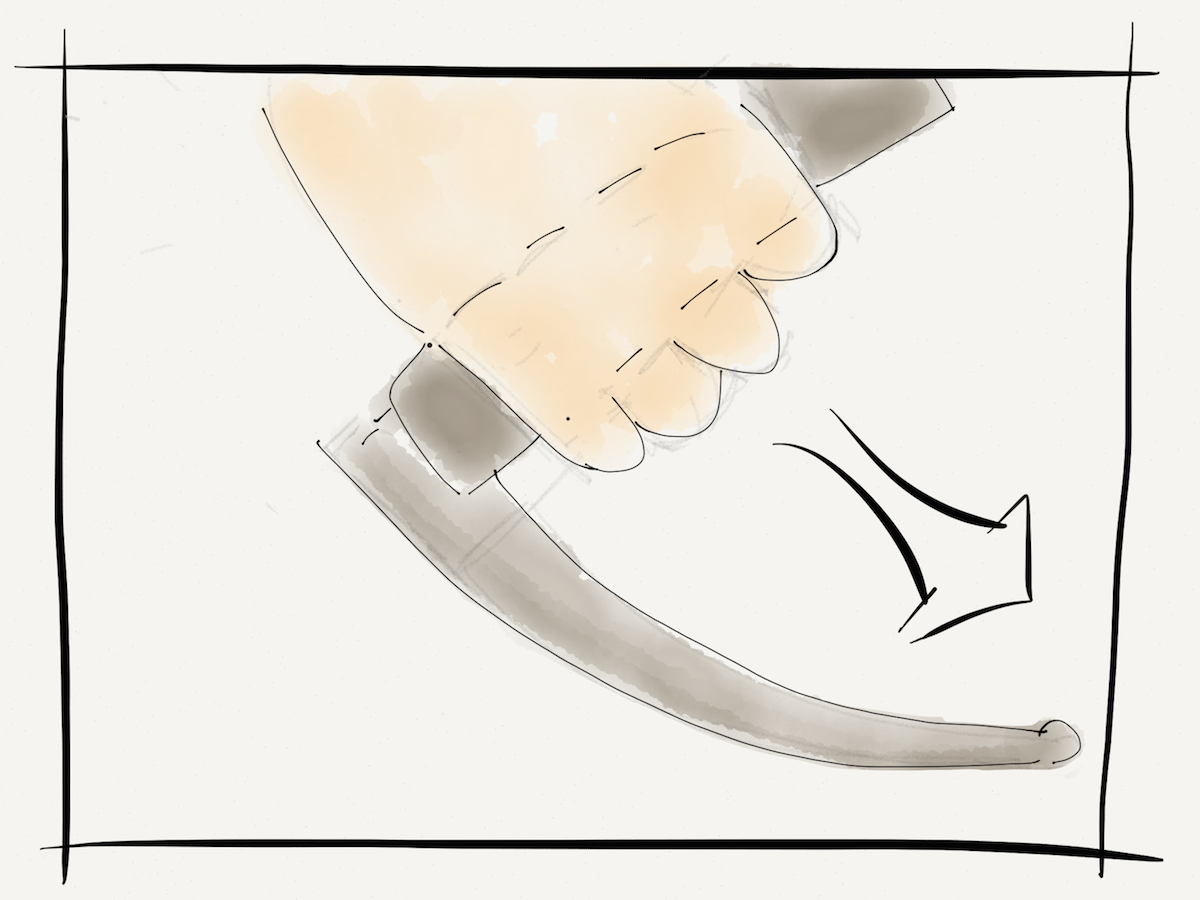
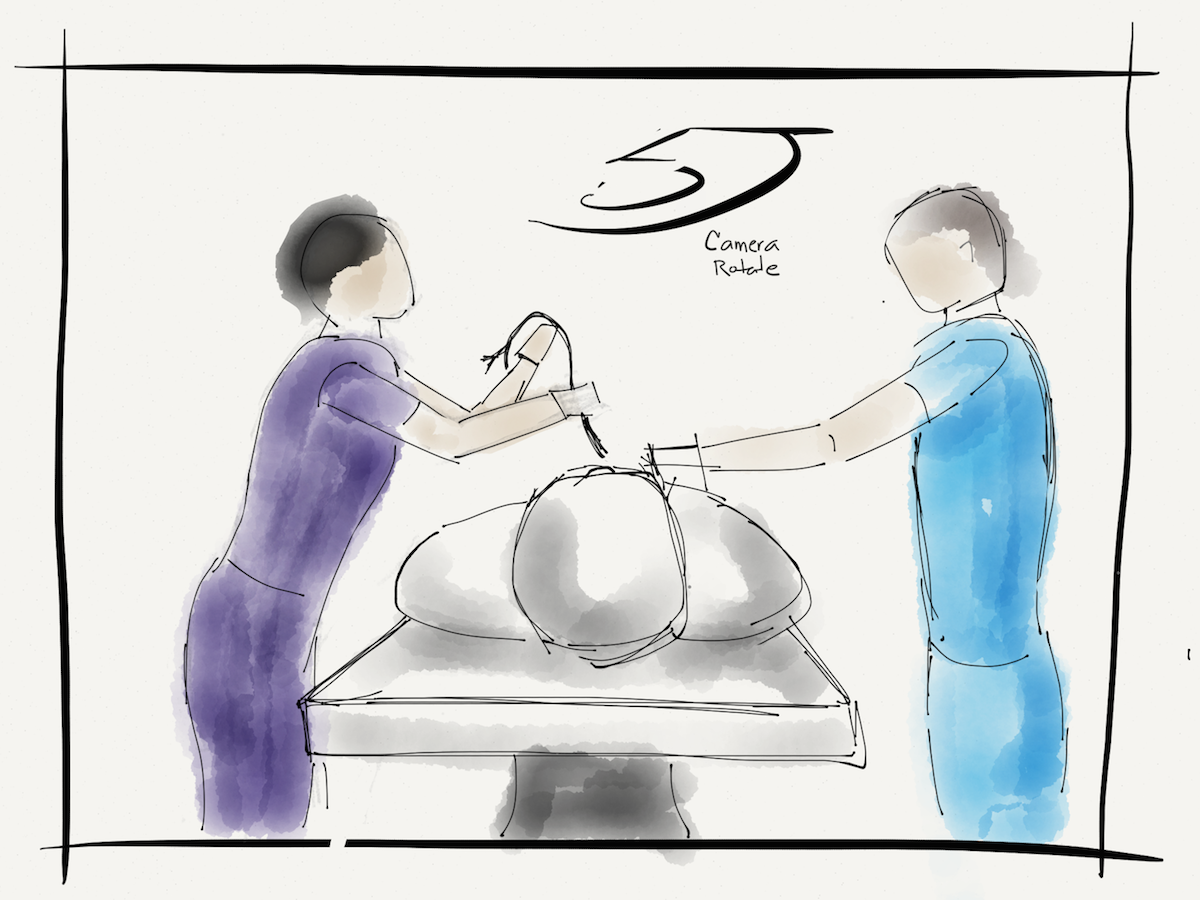
As an example, the gallery below is an early storyboard for a video demonstrating the use of a Minnesota Tube.


What is the difference between a storyboard and previz?
Excellent question. Previsualization (previz) is advanced form of storyboarding. In can include either a physical or digital model that can then be manipulated. Objects can be moved, lighting changed, and the camera position altered. Movements can be experimented, especially easily in digital models. Previz is useful during advanced preproduction planning with complex sets and staging.
[…] is an example of Content Creation Cycle for educational videos. It demonstrates a circular process for you to keep improving video […]
[…] is an example of Content Creation Cycle for educational videos. It demonstrates a circular process for you to keep improving video […]