This is considered a minimally invasive bedside procedure that may be easily performed in the intensive care unit or at the patient’s bedside – with continuous monitoring of the patient’s vital signs.
Evaluation for Perc Trach
Two critically important preoperative criteria for PDT are:
- The ability to hyperextend the neck
- Presence of at least 1 cm distance between cricoid cartilage and suprasternal notch ensuring that the patient will be able to be reintubated in case of accidental extubation
Patients should not be considered for this procedure if they are:
- Children (younger than 12 years of age)
- Patients with severe coagulopathies
- Patients with unidentifiable landmarks
Perc Trach Techniques
There are several different systems and approaches for PDT, but the one in most widespread use is the Ciaglia. With this technique, there is no sharp dissection involved beyond the skin incision. The patient is positioned and prepped in the same way as for the standard operative tracheostomy. General anesthesia is administered and all steps are done under bronchoscopic vision.
Advantages of Perc Trach
The procedure itself is fairly easy to learn, especially in proctored settings. Time required for performing bedside PDT is considerably shorter than that for an open tracheostomy. Elimination of scheduling difficulty associated with operating room and anesthesiology teams for critical care patients. PDT expedites the performance of the procedure because critically ill patients who would require intensive monitoring to and from the operating room need not be transported. Cost of performing PDT is roughly half that of performing open surgical tracheostomy due to the savings in operating room charges and anesthesia fees.
Procedure Steps
Patient Positioning
The patient should be placed supine with towels under the should blades so that the neck is fully extended. Besure that the occiput of the head is against the bed, so that the head is not unsupported.
Skin Incision
The neck should be carefully palpated and the anatomy should identified (thyroid cartilage, cricoid cartilage, and 2-3 tracheal rings). Consider labelling the landmarks with a permanent marker. The ideal location of the tracheostomy would be between the 1st and 3rd tracheal ring. Use ultrasound to identify an large vessels in the area. Once you have identified your location, a horizontal skin incision made about 2-3 cm in length.
Dissection
The pretracheal tissue is cleared by blunt dissection with a mosquito (Kelly clamp), until the trachea is clearly palpable. It need not be fully visualized.
Withdraw Endotracheal Tube
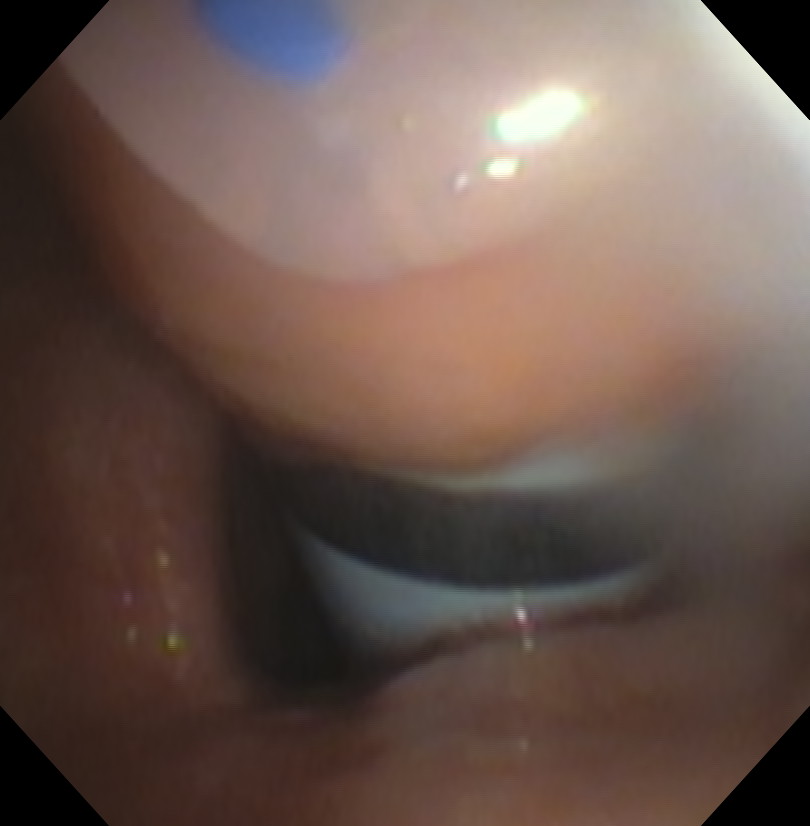
The bronchoscope is fed through the endotracheal tube but kept with the tube itself. The initial view through the bronchoscopic should be similar to the figure below.
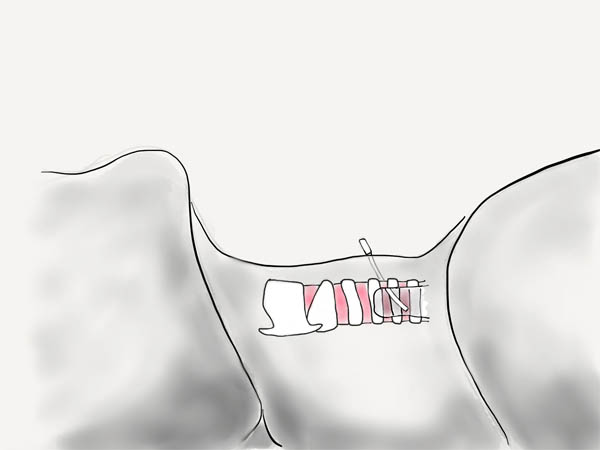
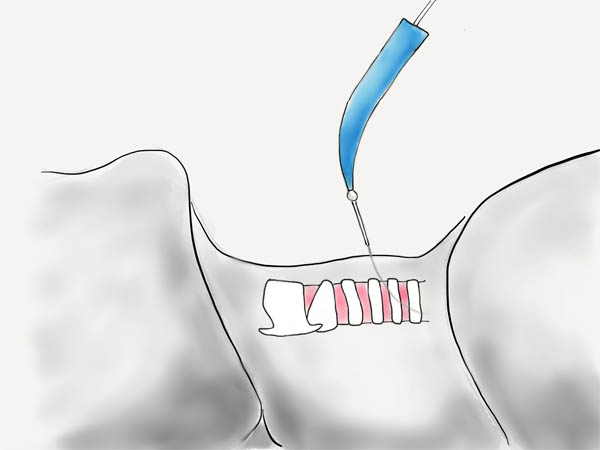
With the Kelly clamp through the neck incision on touching the trachea, begin bouncing against the trachea at the intended puncture site (between the 2nd and 3rd tracheal rings). The endotracheal tube and bronchoscope should then be carefully withdrawn until the bouncing can be seen on the endotracheal surface. A laser can be used through the neck incision to also help guide the withdrawal of the endotracheal tube. The endotracheal tube should be backed up in steps of 0.5-1cm at a time. The bronchoscope is kept within the endotracheal tube at all times to prevent damage to the scope. You need to be careful that the endotracheal is not pulled out of the trachea, accidently extubating the patient. The cuff of the endotracheal tube should not be higher than the level of the glottis.
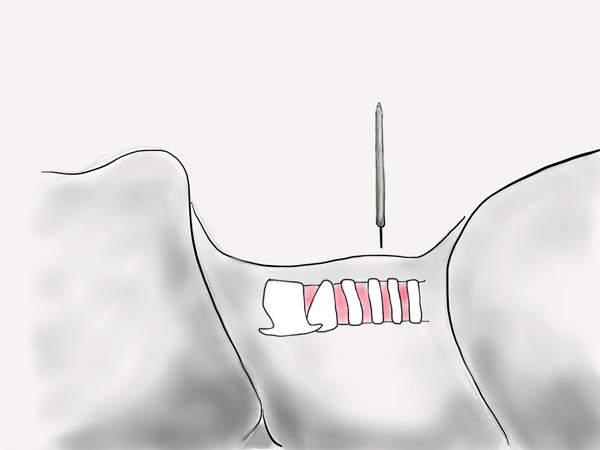
Tracheal Puncture
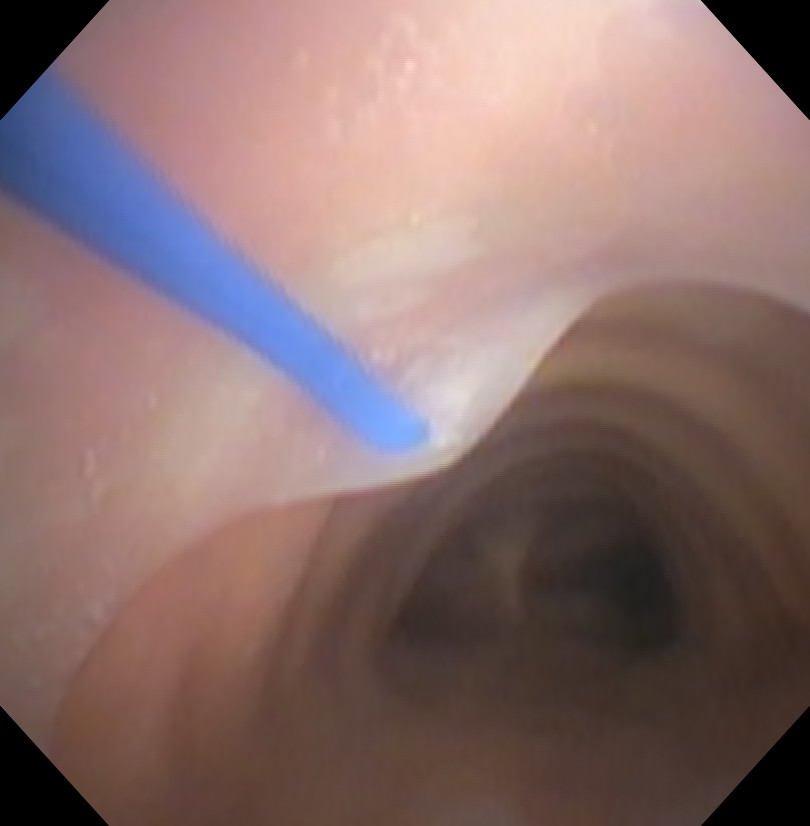
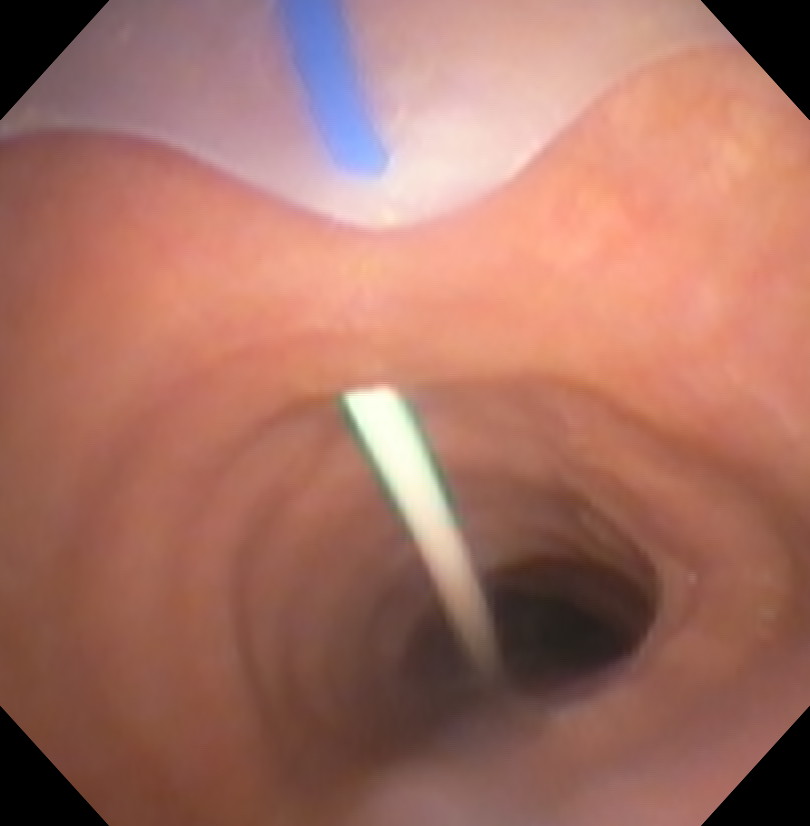
Once you have endotracheal tube withdrawn far enough, the introducer needle is then used to puncture the anterior wall of the trachea under direct bronchoscopic visualization. The bronchoscope should be kept within the endotracheal tube to protect it from being damaged.

Bronchoscopic view of the needle puncturing the anterior trachea.
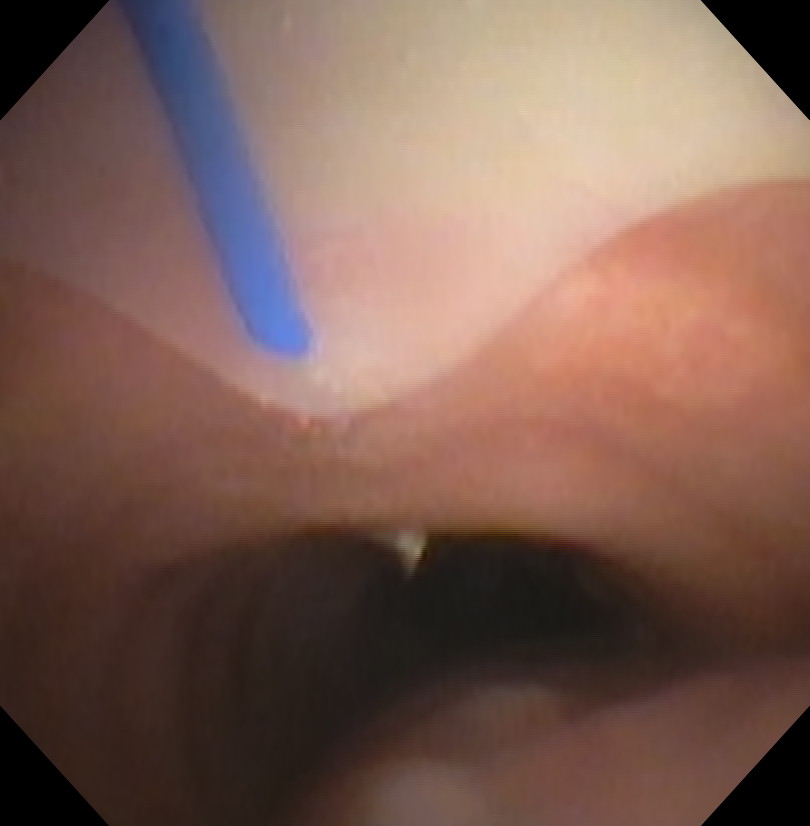
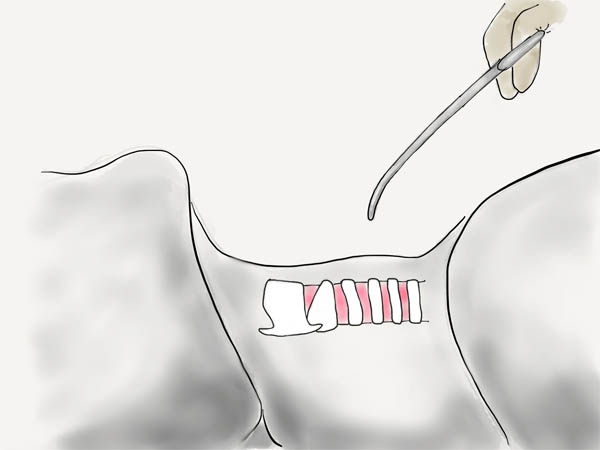
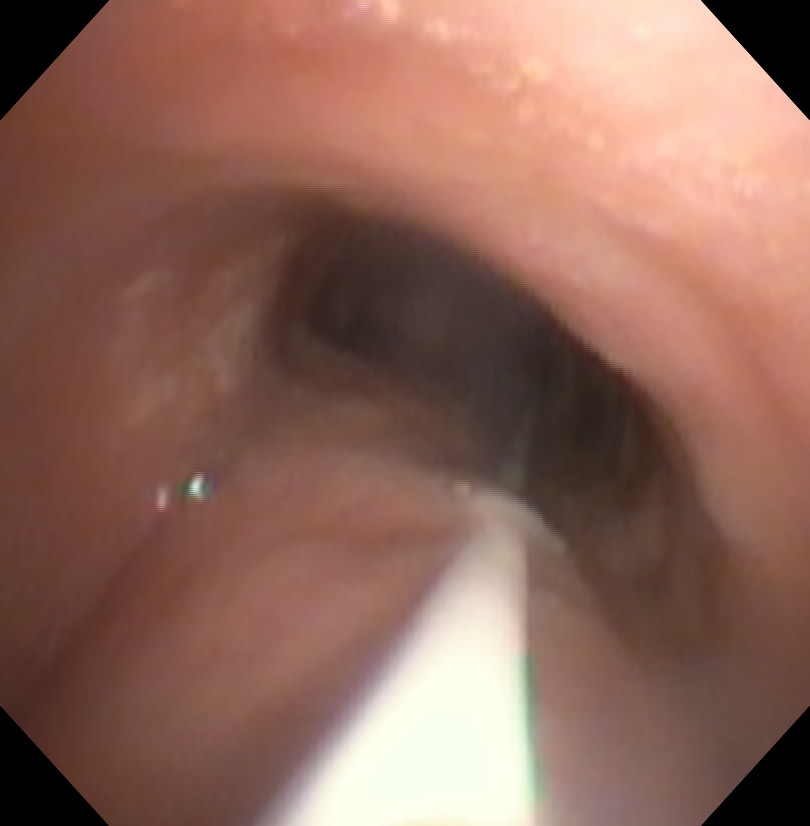
At this point, you can withdraw the needle leaving the catheter in place.
Bronchoscopic view.

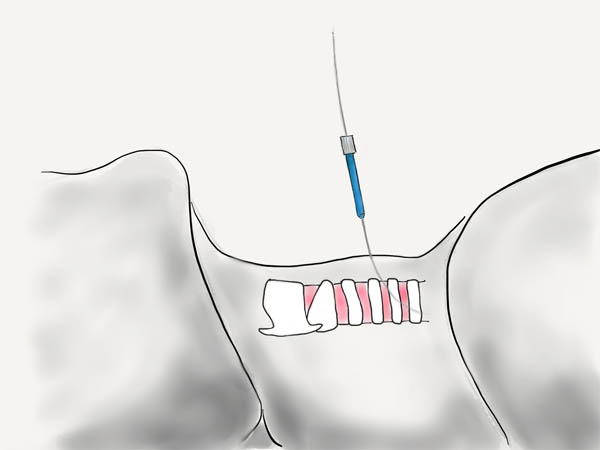
Feed the Wire
A guidewire is fed through the catheter. On the bronchoscope, it should be seen going distally down the trachea towards the carina.

| Proximal Trachea View | Distal Trachea View |
|
|
First Dilator
The catheter is removed over the wire leaving it in place. The first small blue dilator is used to dilate the track.
Progressive Dilator
The large progressive dilator is then used to further dilate the track over the extended catheter.
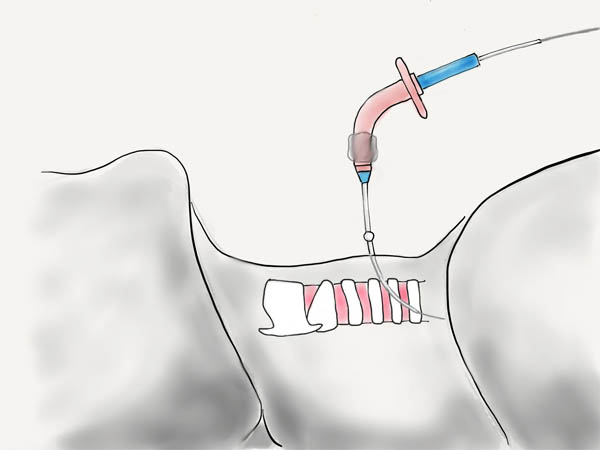
Tracheostomy Tube
A tracheostomy tube with inner trocar is cannulated into the trachea over the extended catheter. There can be problems with this step if the edge of tracheostomy tube becomes deformed.
The tracheostomy tube trocar, wire, and extended catheter can then be removed. The tracheostomy tube should be inflated and the inner cannula insert. You should inspect the site for any cuff leak. The bronchoscope should be removed from the endotracheal tube, and placed down the tracheostomy tube to visualize the carina. Only then should the endotracheal tube be removed.
The tracheostomy tube is secured to the skin with sutures and the tracheostomy tape.
Dont forget to document your perc trach procedure well.
Very nice tutorial. A few comments:
1. the manufacturer directions for the Blue Rhino kit recommend a vertical incision, and I think this adds some safety in avoiding anterior jugular veins. The scar is related much more to the device and how long it is in than the initial incision anyway.
2. There is growing literature about the use of ultrasound for guidance of needle entry, which may be particularly helpful in the obese.
3. In my experience it is very common for the bronchoscopist to fail to withdraw the ET tube adequately and you must be cautious about stabbing the tube with your needle.
I dont agree with Jordan. Be it a vertical or horizontal skin incision, it does not relate to the underlying soft tissue or vessel injury since these structures are merely seperated with the curved hemostat.
I know this is a late comment, but for the last 12+ years, we have used a laser pointer in a sterile glove to aid in the getting the exact puncture site figured out and getting the ETT up high enough as to not damage the scope.